
Recently I finished building the Jaguar Formula 1 car by Yasu Tanaka. I’d wanted to build one for some time, and I needed a picture for my menus, so it seemed like time to do it.
This build was my first attempt at clear-coating the parts sheets before assembly. I’m very pleased with the end result, but I did find that the clear coat interfered with gluing in a number of places, and I had to carefully scrape the clear coat off to allow the glue to adhere better.
Overall the kit is excellent and I would recommend it, but read further for a few cautions. The present instructions consist of a series of photos with (very) brief text but use small, low resolution images. There is also a numbered schematic that identifies all the parts and where they go. The schematic is actual size so you can easily compare pieces with the schematic. Higher resolution images would help immensely, and familiarity with Formula 1 cars would help too. It took me some extra time to figure out where some parts went and how to fold them since I know next to nothing about the subject other than they look cool and go very fast. I’ve included some pictures from my build below. Perhaps they will be helpful to someone.
The finished model is 13.5 cm long (5.25 inches). If I were to build another one of Tanaka’s kits I think I would enlarge it 25 to 50%. Some of the parts were very small, and I don’t generally mind small parts, so that’s saying something. In the end I’m very happy with the finished model and am eager to build another F1 car in a larger scale and with more detail.
Enjoy the pictures!
Steve
-

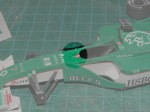
- The main body under construction

-

- Top view of main body parts

-

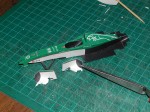
- Main body assembled

-

- Lower front suspension added

-
- Base added and starting the side cowlings

-

- Continuing the side cowlings

-
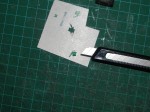
- Rear view mirror cut out and ready for folding

-
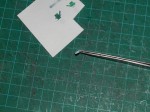
- Side mirror folded into shape

-

- Another view of side mirror after folding into shape

-
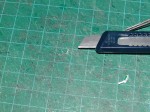
- Don’t know what this piece is called, but see the next picture for where it goes

-
- Placement of the piece from the previous picture

-

- Building the wheels

-

- And the finshed product

-

- Shot of the finished model for use in some cutout pictures

-

- Finished F1 Jaguar

-

- Finished model

-
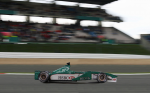
- And there she goes well ahead of the pack

-
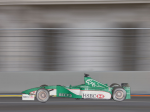
- Another high speed pass down the straight-away


